> ## Documentation Index
> Fetch the complete documentation index at: https://docs.cekura.ai/llms.txt
> Use this file to discover all available pages before exploring further.
# Agent Setup Guide
> Step-by-step guide to creating and configuring an AI voice and chat agent on Cekura
export const CopyPageButton = () => {
if (typeof window !== 'undefined') {
setTimeout(function () {
if (document.getElementById('ck-tools')) return;
var anchor = document.getElementById('content-area') || document.querySelector('.mdx-content');
if (!anchor) return;
if (!document.getElementById('ck-style')) {
var s = document.createElement('style');
s.id = 'ck-style';
s.textContent = '#ck-tools{position:absolute;top:6px;right:0;z-index:100;font-family:inherit;}' + '.ck-row{display:inline-flex;align-items:stretch;border:1px solid rgba(0,0,0,0.15);border-radius:8px;overflow:hidden;background:#fff;}' + ':root.dark .ck-row{background:rgba(255,255,255,0.06);border-color:rgba(255,255,255,0.12);}' + '.ck-btn{padding:5px 12px;border:none;background:none;cursor:pointer;font-size:13px;font-weight:500;font-family:inherit;color:#374151;}' + ':root.dark .ck-btn{color:#d1d5db;}' + '.ck-btn:hover{background:rgba(0,0,0,0.04);}' + ':root.dark .ck-btn:hover{background:rgba(255,255,255,0.06);}' + '.ck-chevron{padding:5px 8px;border:none;background:none;cursor:pointer;font-size:14px;font-family:inherit;color:#374151;}' + ':root.dark .ck-chevron{color:#d1d5db;}' + '.ck-chevron:hover{background:rgba(0,0,0,0.04);}' + ':root.dark .ck-chevron:hover{background:rgba(255,255,255,0.06);}' + '.ck-divider{width:1px;background:rgba(0,0,0,0.12);flex-shrink:0;}' + ':root.dark .ck-divider{background:rgba(255,255,255,0.12);}' + '.ck-dd{position:absolute;top:calc(100% + 4px);right:0;min-width:180px;background:#fff;border:1px solid rgba(0,0,0,0.12);border-radius:8px;box-shadow:0 4px 12px rgba(0,0,0,0.1);padding:4px;display:none;z-index:200;}' + ':root.dark .ck-dd{background:#1f2937;border-color:rgba(255,255,255,0.1);box-shadow:0 4px 16px rgba(0,0,0,0.35);}' + '.ck-item{display:block;width:100%;padding:7px 12px;border:none;background:none;border-radius:6px;cursor:pointer;font-size:13px;font-family:inherit;text-align:left;color:#374151;}' + ':root.dark .ck-item{color:#d1d5db;}' + '.ck-item:hover{background:rgba(0,0,0,0.05);}' + ':root.dark .ck-item:hover{background:rgba(255,255,255,0.07);}';
document.head.appendChild(s);
}
var wrap = document.createElement('div');
wrap.id = 'ck-tools';
var row = document.createElement('div');
row.className = 'ck-row';
var mainBtn = document.createElement('button');
mainBtn.className = 'ck-btn';
mainBtn.textContent = 'Copy page';
var divider = document.createElement('span');
divider.className = 'ck-divider';
var chevron = document.createElement('button');
chevron.className = 'ck-chevron';
chevron.textContent = '▾';
var dd = document.createElement('div');
dd.className = 'ck-dd';
function closeDD() {
dd.style.display = 'none';
}
function openDD() {
dd.style.display = 'block';
}
chevron.onclick = function (e) {
e.stopPropagation();
if (dd.style.display === 'block') {
closeDD();
} else {
openDD();
}
};
document.addEventListener('click', function (e) {
if (!e.target.closest('#ck-tools')) {
closeDD();
}
});
document.addEventListener('keydown', function (e) {
if (e.key === 'Escape') {
closeDD();
}
});
function makeItem(label, fn) {
var b = document.createElement('button');
b.className = 'ck-item';
b.textContent = label;
b.onclick = function () {
fn();
closeDD();
};
return b;
}
function getMarkdown() {
var walk = function (node) {
if (!node) return '';
if (node.nodeType === 3) return node.textContent || '';
if (node.nodeType !== 1) return '';
var tag = node.tagName.toLowerCase();
var skip = ['script', 'style', 'svg', 'noscript', 'button', 'iframe'];
if (skip.indexOf(tag) !== -1) return '';
if (node.id === 'ck-tools') return '';
var ch = Array.from(node.childNodes).map(walk).join('');
if (tag === 'h1') return '\n# ' + ch.trim() + '\n\n';
if (tag === 'h2') return '\n## ' + ch.trim() + '\n\n';
if (tag === 'h3') return '\n### ' + ch.trim() + '\n\n';
if (tag === 'p') return '\n' + ch.trim() + '\n\n';
if (tag === 'pre') return '\n```\n' + node.textContent.trim() + '\n```\n\n';
if (tag === 'li') return '- ' + ch.trim() + '\n';
if (tag === 'code') return '`' + ch.trim() + '`';
return ch;
};
var content = document.querySelector('.mdx-content') || document.getElementById('content-area') || document.body;
return walk(content).replace(/\n\n\n+/g, '\n\n').trim();
}
function copyMd() {
var md = getMarkdown();
navigator.clipboard.writeText(md).then(function () {
mainBtn.textContent = 'Copied!';
setTimeout(function () {
mainBtn.textContent = 'Copy page';
}, 2000);
});
}
function viewMd() {
var md = getMarkdown();
var safe = md.split('&').join('&').split('<').join('<').split('>').join('>');
var html = '' + safe + '';
window.open(URL.createObjectURL(new Blob([html], {
type: 'text/html'
})), '_blank');
}
function openClaude() {
var prompt = 'Can you read this Cekura docs page ' + window.location.href + ' so I can ask you questions?';
window.open('https://claude.ai/new?q=' + encodeURIComponent(prompt), '_blank');
}
mainBtn.onclick = copyMd;
dd.appendChild(makeItem('Copy page', copyMd));
dd.appendChild(makeItem('View as Markdown', viewMd));
dd.appendChild(makeItem('Open in Claude', openClaude));
row.appendChild(mainBtn);
row.appendChild(divider);
row.appendChild(chevron);
wrap.appendChild(row);
wrap.appendChild(dd);
anchor.style.position = 'relative';
anchor.insertBefore(wrap, anchor.firstChild);
}, 50);
}
return null;
};
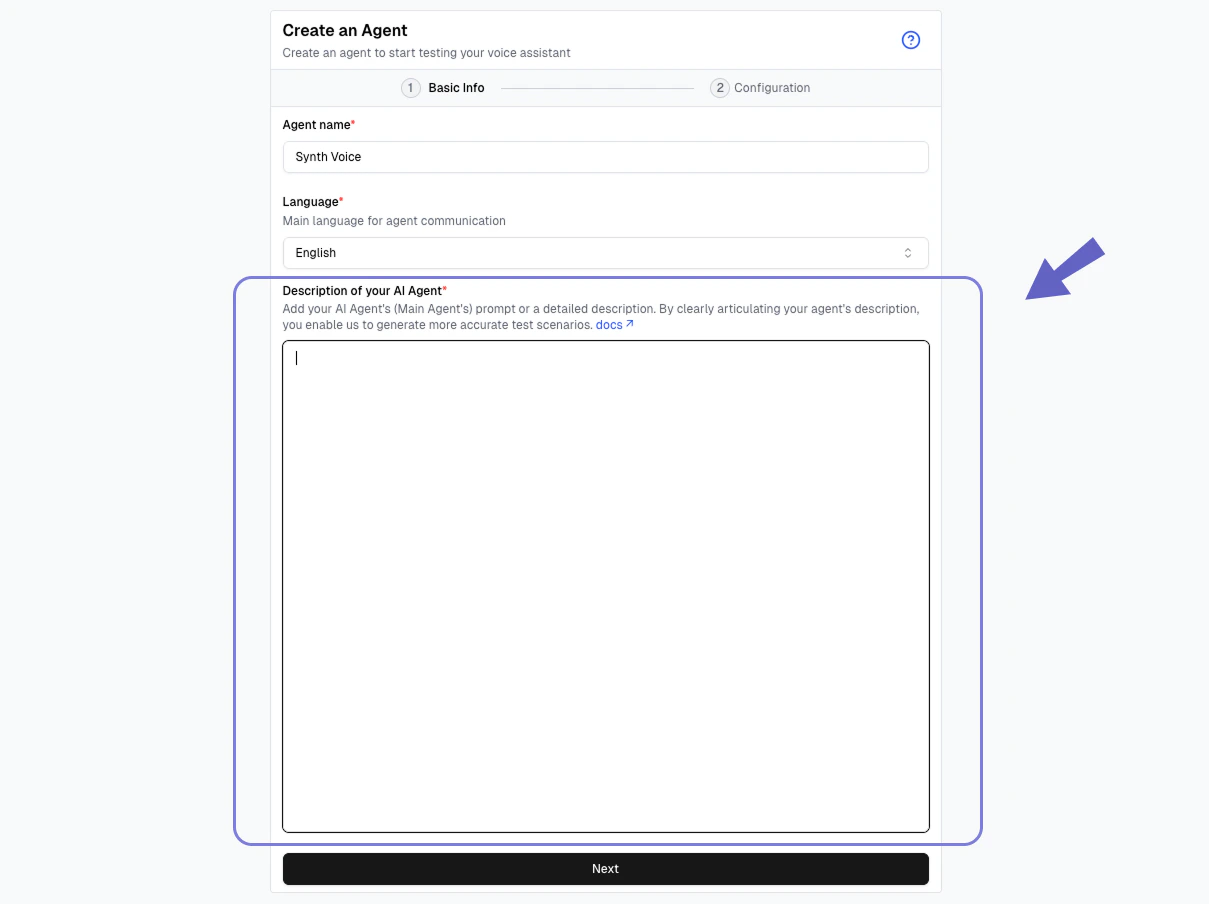
## Create an Agent
1. Go to the **Agents** section from the left navigation bar.
2. Click the **Create Agent** button in the top right, or if you're a new user, click **Create your first agent** in the center of the page.
3. Fill in basic info: agent name, language, and description.
4. Configure a provider and connection type.
## Basic Info
A label to identify this agent within Cekura. Choose something descriptive so you can easily distinguish it from other agents (e.g. "Support Bot Production" or "Sales Agent v2").
The primary language your agent speaks. Cekura uses this to run simulations and generate evaluators in the correct language.
A comprehensive overview of your agent's purpose, behaviour, and operational guidelines. See the [Agent Description](#agent-description) section below for details on what to include and how to structure it.
### Agent Description
Agent Description is a comprehensive overview of your voice conversational agent’s purpose, behaviour, and operational guidelines. It encapsulates all the instructions, prompts, and rules you provide to your AI agent.
> By clearly articulating your agent’s description, you enable us to **generate automatic, accurate evaluators.**
Most customers include their `agent’s main prompt` here.
 ### Type of Agent
For Single prompt agents, you can copy the agent's main prompt here.
If you have multi-state agent, you can build a description in a json structure. \
Note - We are very flexible with description so even if you copy paste all your prompts and paste as one huge prompt, we can process. JSON is the recommended approach.
```json theme={null}
[
{
"node_name": "<>",
"node_description": "<>"
},
{
"node_name": "<>",
"node_description": "<>"
}
]
```
If you have an agent with Retell workflows, you can export the agent's details as json from Retell. \
Go to agents -> select the agent -> click on export button (this will download a .json file) -> copy the content of the file and paste it in agent description field.
### Type of Agent
For Single prompt agents, you can copy the agent's main prompt here.
If you have multi-state agent, you can build a description in a json structure. \
Note - We are very flexible with description so even if you copy paste all your prompts and paste as one huge prompt, we can process. JSON is the recommended approach.
```json theme={null}
[
{
"node_name": "<>",
"node_description": "<>"
},
{
"node_name": "<>",
"node_description": "<>"
}
]
```
If you have an agent with Retell workflows, you can export the agent's details as json from Retell. \
Go to agents -> select the agent -> click on export button (this will download a .json file) -> copy the content of the file and paste it in agent description field.
 If you have an agent with Vapi workflows, you can export the agent's details as json from Vapi. \
Go to workflows -> select the agent -> click on `code` button on top right -> copy the content shown and paste it in agent description field.
If you have an agent with Vapi workflows, you can export the agent's details as json from Vapi. \
Go to workflows -> select the agent -> click on `code` button on top right -> copy the content shown and paste it in agent description field.
 You can follow the same approach for other providers.
## Configuration
The Configuration section connects your Cekura agent to the actual AI platform powering it. This is what allows Cekura to simulate calls, run evaluations, and observe live traffic against your real agent.
### Provider
Select the platform your agent is built on. Cekura supports a wide range of providers out of the box. You can explore different providers below and go to their integration specific docs to know more.
Once you select a provider, you'll be prompted to enter the relevant connection details — such as API keys, assistant IDs, or other credentials specific to that provider.
### Connection
Choose how Cekura connects to your agent to run simulations and collect data. The available connection types depend on your agent's channel — voice or chat.
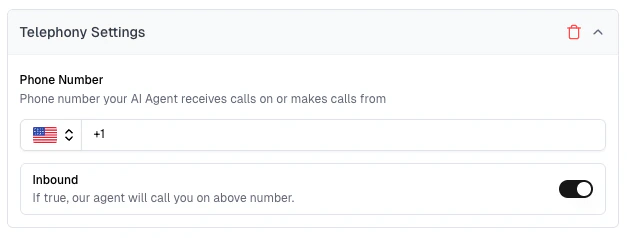
#### Voice Connection
Connect via a **phone number**. Cekura will dial your agent directly over the PSTN network, making it the simplest way to test a phone-based voice agent.
Add the phone number your agent receives calls on or makes calls from.
Toggle **Inbound** on if you want Cekura's agent to call you on the above number. Leave it off for outbound — Cekura will dial your agent instead.
You can follow the same approach for other providers.
## Configuration
The Configuration section connects your Cekura agent to the actual AI platform powering it. This is what allows Cekura to simulate calls, run evaluations, and observe live traffic against your real agent.
### Provider
Select the platform your agent is built on. Cekura supports a wide range of providers out of the box. You can explore different providers below and go to their integration specific docs to know more.
Once you select a provider, you'll be prompted to enter the relevant connection details — such as API keys, assistant IDs, or other credentials specific to that provider.
### Connection
Choose how Cekura connects to your agent to run simulations and collect data. The available connection types depend on your agent's channel — voice or chat.
#### Voice Connection
Connect via a **phone number**. Cekura will dial your agent directly over the PSTN network, making it the simplest way to test a phone-based voice agent.
Add the phone number your agent receives calls on or makes calls from.
Toggle **Inbound** on if you want Cekura's agent to call you on the above number. Leave it off for outbound — Cekura will dial your agent instead.
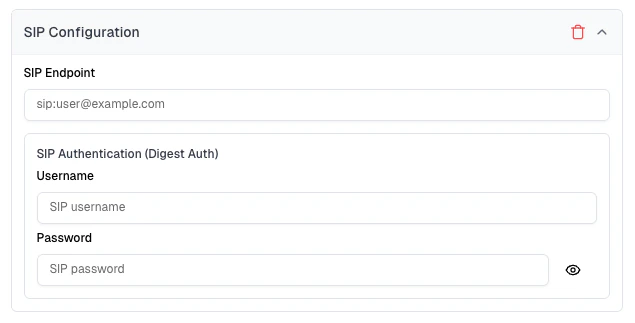
 Connect via a **SIP trunk**. Suited for enterprise telephony setups where your agent is reachable through a SIP endpoint rather than a regular phone number.
Add the SIP address your agent is reachable on (e.g. `sip:user@example.com`).
If your SIP server uses Digest Auth, enter the **Username** and **Password** to authenticate the connection.
Connect via a **SIP trunk**. Suited for enterprise telephony setups where your agent is reachable through a SIP endpoint rather than a regular phone number.
Add the SIP address your agent is reachable on (e.g. `sip:user@example.com`).
If your SIP server uses Digest Auth, enter the **Username** and **Password** to authenticate the connection.
 **WebRTC** enables real-time browser-based voice testing without needing a phone number or external device.
WebRTC is configured automatically upon choosing your provider and filling in the relevant details.
WebRTC calls are only supported by [LiveKit](/documentation/integrations/livekit/testing), [Pipecat](/documentation/integrations/pipecat-integration), [VAPI](/documentation/integrations/vapi/testing), [Retell](/documentation/integrations/retell/testing), and [Agora](/documentation/integrations/agora).
#### Chat Connection
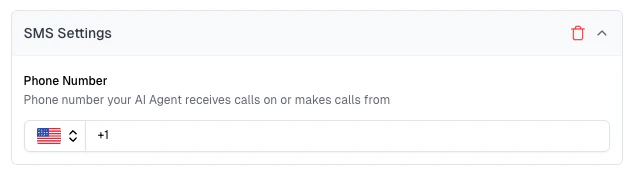
Connect via SMS. Enter the **phone number** your agent sends and receives chat messages on.
Already configured if you've set up Telephony — the same number is used automatically.
**WebRTC** enables real-time browser-based voice testing without needing a phone number or external device.
WebRTC is configured automatically upon choosing your provider and filling in the relevant details.
WebRTC calls are only supported by [LiveKit](/documentation/integrations/livekit/testing), [Pipecat](/documentation/integrations/pipecat-integration), [VAPI](/documentation/integrations/vapi/testing), [Retell](/documentation/integrations/retell/testing), and [Agora](/documentation/integrations/agora).
#### Chat Connection
Connect via SMS. Enter the **phone number** your agent sends and receives chat messages on.
Already configured if you've set up Telephony — the same number is used automatically.
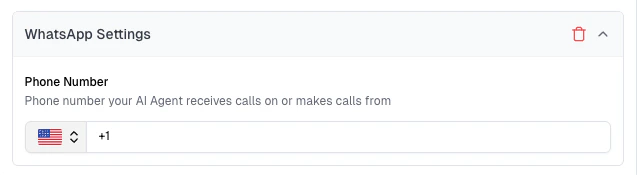
 Connect via WhatsApp. Enter the **WhatsApp-enabled phone number** your agent sends and receives chat messages on.
Already configured if you've set up Telephony — the same number is used automatically.
Configure Twilio credentials in **Settings → Provider API Keys** for WhatsApp integration.
See [WhatsApp Testing Guide](/documentation/guides/testing-agents/whatsapp-testing) for detailed setup.
Connect via WhatsApp. Enter the **WhatsApp-enabled phone number** your agent sends and receives chat messages on.
Already configured if you've set up Telephony — the same number is used automatically.
Configure Twilio credentials in **Settings → Provider API Keys** for WhatsApp integration.
See [WhatsApp Testing Guide](/documentation/guides/testing-agents/whatsapp-testing) for detailed setup.
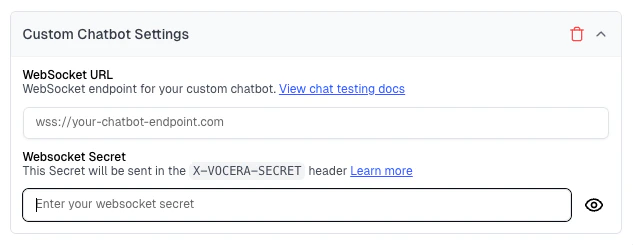
 **WebSocket** enables real-time, two-way chat between your agent and the LLM, allowing dynamic and continuous conversation testing.
Add the WebSocket endpoint your chatbot is reachable on (e.g. `wss://your-chatbot-endpoint.com`).
Add a secret that Cekura will send in the `X-VOCERA-SECRET` header with every request, so your server can verify the connection.
**WebSocket** enables real-time, two-way chat between your agent and the LLM, allowing dynamic and continuous conversation testing.
Add the WebSocket endpoint your chatbot is reachable on (e.g. `wss://your-chatbot-endpoint.com`).
Add a secret that Cekura will send in the `X-VOCERA-SECRET` header with every request, so your server can verify the connection.
 Connect directly through your provider's native chat interface — no phone number or messaging service required.
Native provider chat is only available with [ElevenLabs](/documentation/integrations/elevenlabs/observability), [VAPI](/documentation/integrations/vapi/testing), [LiveKit](/documentation/integrations/livekit/testing), [Retell](/documentation/integrations/retell/testing), and Bland AI.
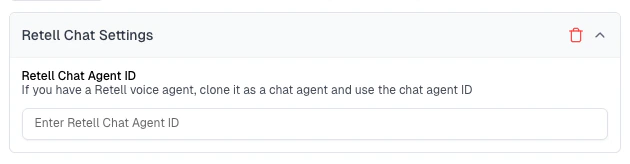
Provider chat is configured automatically using your voice agent settings. However, **Retell** and **Bland AI** require some additional configuration — you'll need to provide a separate chat agent ID for those providers.
Connect directly through your provider's native chat interface — no phone number or messaging service required.
Native provider chat is only available with [ElevenLabs](/documentation/integrations/elevenlabs/observability), [VAPI](/documentation/integrations/vapi/testing), [LiveKit](/documentation/integrations/livekit/testing), [Retell](/documentation/integrations/retell/testing), and Bland AI.
Provider chat is configured automatically using your voice agent settings. However, **Retell** and **Bland AI** require some additional configuration — you'll need to provide a separate chat agent ID for those providers.
 ## Additional Settings (Optional)
These settings are available when editing an existing agent. To access them, go to the **Agents** section in the left sidebar → click on the agent you want to configure.
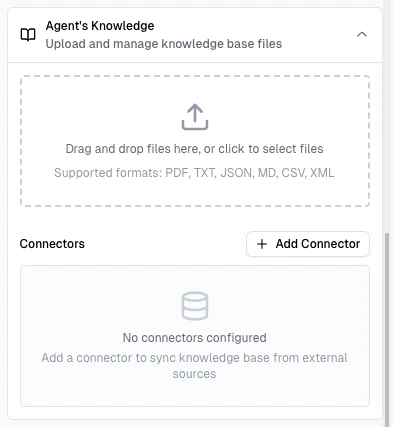
Upload reference material your agent uses, so Cekura can generate more accurate evaluators grounded in your content.
We support two options for Knowledge Base:
* **Upload a document** — drag and drop or select a file directly. Supported formats: PDF, TXT, JSON, MD, CSV, XML.
* **Connect an external source** — click **Add Connector** to sync knowledge base content from an external source such as Google BigQuery or a Website Scraper.
## Additional Settings (Optional)
These settings are available when editing an existing agent. To access them, go to the **Agents** section in the left sidebar → click on the agent you want to configure.
Upload reference material your agent uses, so Cekura can generate more accurate evaluators grounded in your content.
We support two options for Knowledge Base:
* **Upload a document** — drag and drop or select a file directly. Supported formats: PDF, TXT, JSON, MD, CSV, XML.
* **Connect an external source** — click **Add Connector** to sync knowledge base content from an external source such as Google BigQuery or a Website Scraper.
 Define mock input/output data for tool calls so Cekura can simulate your agent's tool usage during testing.
There are two ways to add mock tools:
* **Auto-Fetch** — automatically pulls your tool definitions directly from your provider, so you don't have to add them manually.
* **Add Tool manually** — create a mock tool yourself and define its behaviour using Input/Output Mappings in JSON.
Define mock input/output data for tool calls so Cekura can simulate your agent's tool usage during testing.
There are two ways to add mock tools:
* **Auto-Fetch** — automatically pulls your tool definitions directly from your provider, so you don't have to add them manually.
* **Add Tool manually** — create a mock tool yourself and define its behaviour using Input/Output Mappings in JSON.
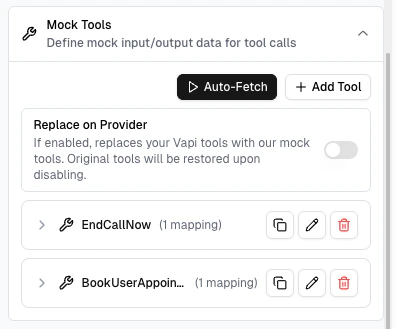 Read more about [Mock Tools](/documentation/guides/testing-agents/mock-tools).
Dynamic variables are values injected at call time during scenario generation — letting you parameterise your test scenarios with real-world data like names, addresses, or account IDs instead of hardcoding them.
Click **Add Variables** to define a new variable. Each variable has a name (e.g. `address`, `name`) and a default value that Cekura uses when running simulations.
Read more about [Mock Tools](/documentation/guides/testing-agents/mock-tools).
Dynamic variables are values injected at call time during scenario generation — letting you parameterise your test scenarios with real-world data like names, addresses, or account IDs instead of hardcoding them.
Click **Add Variables** to define a new variable. Each variable has a name (e.g. `address`, `name`) and a default value that Cekura uses when running simulations.
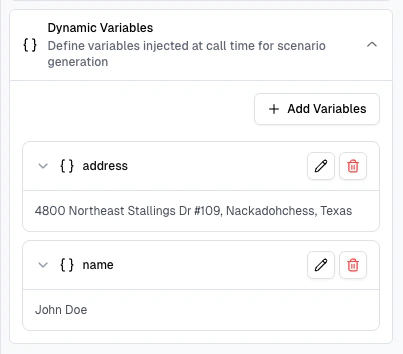 Read more about [Dynamic Variables](/documentation/key-concepts/evaluators/dynamic-variables).